
1. Drag and Drop a Rate Con
If you have a rate confirmation, drop it into the new load form and Truckpedia fills in the load for you.
Steps:
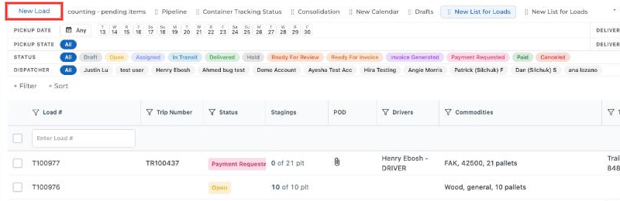
- Go to Dispatch and click New Load in the top left.
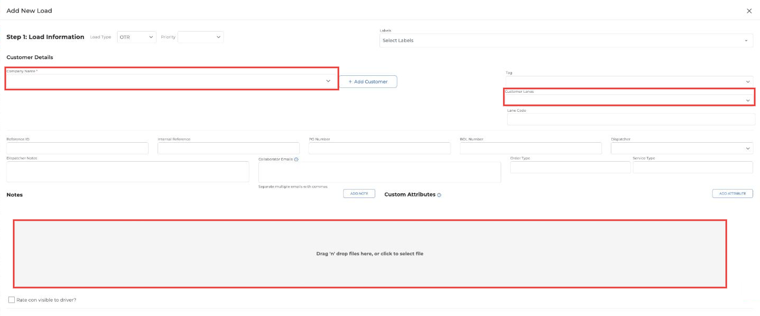
- Drop the rate con into the Drag 'n' drop files here area (or click it to choose a file).
- Truckpedia fills in the customer, stops, dates and other details from the rate con.
- Always double-check the auto-filled information, add anything missing, then click Submit.
2. Enter the Load Manually
If you prefer, you can type in all of the load information yourself.
Steps:
- Go to Dispatch and click New Load.
- In Step 1, pick the customer (or click + Add Customer) and fill in references such as PO number, BOL number and dispatcher.
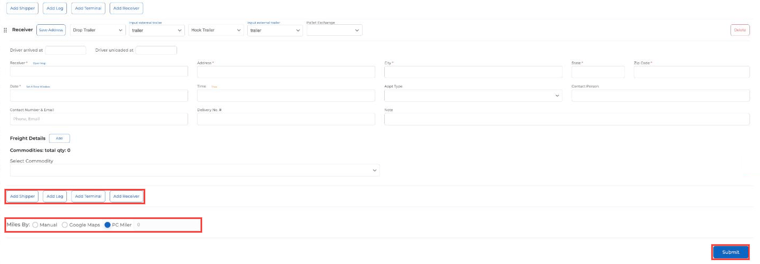
- In Step 2, add the shipper and receiver with addresses, dates and times. Use Add Shipper, Add Leg, Add Terminal or Add Receiver for extra stops.
- Choose how miles are calculated (Manual, Google Maps or PC Miler) and click Submit.
After the load is created, open it to add charges in Step 3: Load Charge and assign a driver and equipment in Step 4: Assign Driver & Equipment. A load without a driver shows as Open; once a driver is assigned it shows as Assigned.
3. Use a Customer Lane (for Recurring Lanes)
If you run the same lane for a customer again and again, save it as a lane and reuse it.
Save the lane:
- Go to Customers, find the customer and click Edit (or Add New Customer if they’re new).
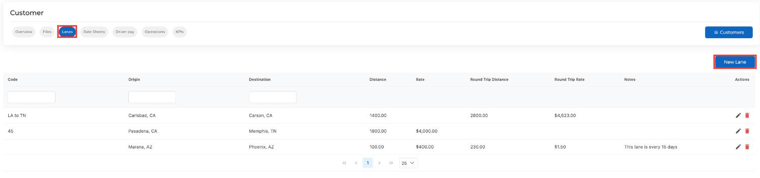
- Open the Lanes tab and click New Lane.
- Enter the origin and destination, distance, rate and any notes, then click Save.
Use the lane on a load:
- Click New Load and pick the customer.
- Choose the lane from the Customer Lanes dropdown. The stops and rate fill in automatically.
- Click Submit.

See How to Use Lane Codes for more on lanes.
4. Create Loads via EDI
If you need EDI to receive load tenders and send tracking updates to your shippers, contact your account rep to set it up.
Summary
- Drag and drop a rate con: fills in the load automatically.
- Manual entry: full control over every field.
- Customer lanes: fastest for recurring shipments.
- EDI: loads come in automatically from your customer’s system.
You can also bring in many loads at once from a CSV. See How to Import Loads in Bulk.