
What Are Labels?
Labels are custom identifiers you can add to loads, drivers, trucks and trailers to organize, track and filter your operation.
Labels are separate from Tags. Tags represent your companies, MCs or terminals. Labels are flexible categories you define, for example a branch or a type of freight.
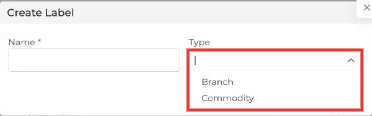
Label types:
- Branch: group by location, team or business line (e.g., New York Yard, Brokerage, Night Shift Team).
- Commodity: group by type of freight (e.g., Wood, Poles, Scrap). Commodity labels are also used with Saved Commodities.
Creating and Managing Labels
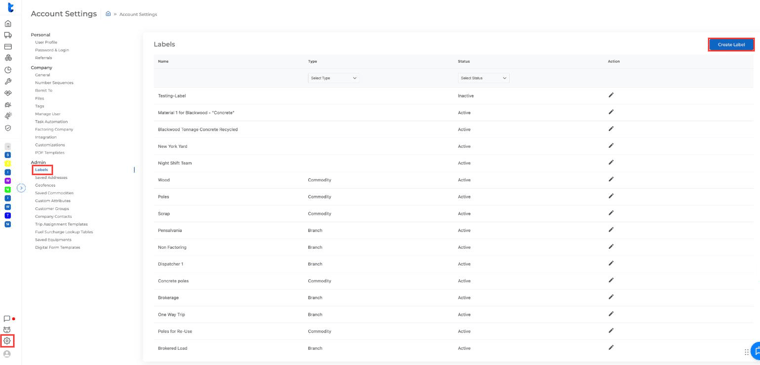
- Click the gear icon at the bottom left of the menu.
- Under Admin, click Labels.
- Click Create Label, enter a name, pick a type and click Submit.
To rename a label or make it inactive, click the pencil icon next to it. Use the Type and Status filters to find labels quickly.
Assigning Labels
Loads
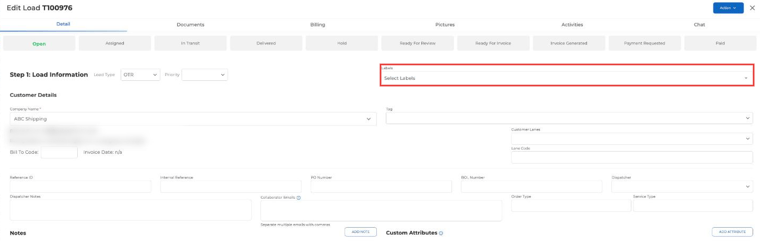
- Go to Dispatch and open the load.
- In Step 1: Load Information, pick one or more labels in the Labels field.
- Click Save.
Drivers, trucks and trailers
- Go to Assets and open the driver, truck or trailer.
- Pick the labels in the Labels field on the Overview tab.
- Click Save (or Update).
Filtering by Labels
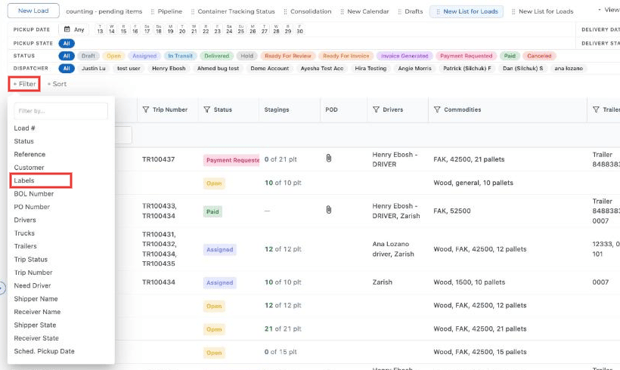
- Loads: in the Dispatch list view, click + Filter and choose Labels. Only loads with the selected labels will show.
- Assets: in the Trucks and Trailers lists, use the filter on the Labels column. You can save the filter as a list.
Best Practices
- Use consistent label names so categories stay clear.
- Review your labels regularly and set old ones to inactive.
Troubleshooting
- Make sure the label is Active and saved on the record.
- Refresh the page if a new label doesn’t show up in a filter yet.
- For further help, contact help@truckpedia.io.