
If you run more than one MC or more than one company, tags let you keep each company's loads, drivers, equipment and users separate inside one Truckpedia account.
Why use tags?
- Keep operations separate for each MC or company
- Track loads by company
- Assign drivers and equipment to the right company or branch
- See dashboard numbers for one company at a time
- Make it clear which loads and drivers belong to which business
Step 1: Plan your tags
Decide what each tag stands for before you create them. For example:
- MC numbers (MC123456, MC789012)
- Company names or short names (ETC-KY, ETC-TN, Express Sub1)
- Divisions (Dry Van Ops, Brokerage Division)
Keep names short, clear and consistent.
Step 2: Create your tags
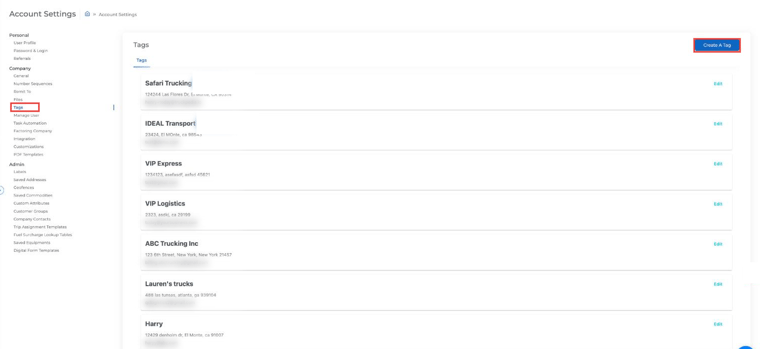
- Click the gear icon at the bottom left to open Settings, then go to Company → Tags.
- Click Create A Tag.
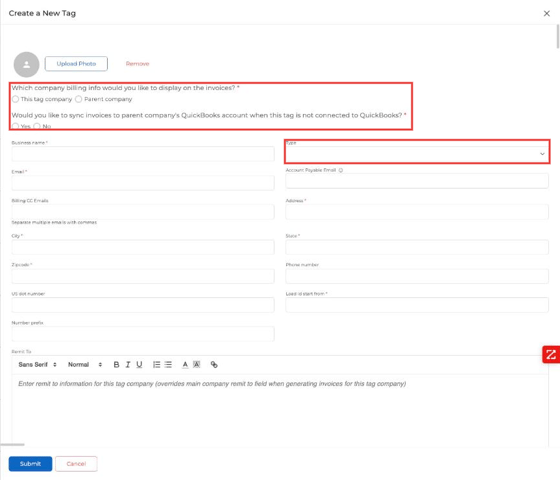
- Choose whose billing info shows on invoices (this tag company or the parent company) and whether invoices sync to the parent company's QuickBooks.
- Fill in the business name, email, address and other details. Choose the Type if it applies.
- Click Submit.
You can create all your tags up front or add them as you go.
Step 3: Apply tags
Open the record, pick the tag in its Tag or Tags field and save:
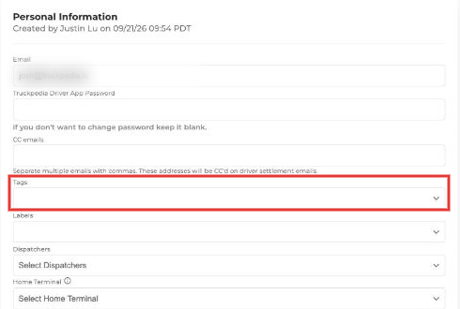
- Drivers: in the driver's Overview tab, under Personal Information.
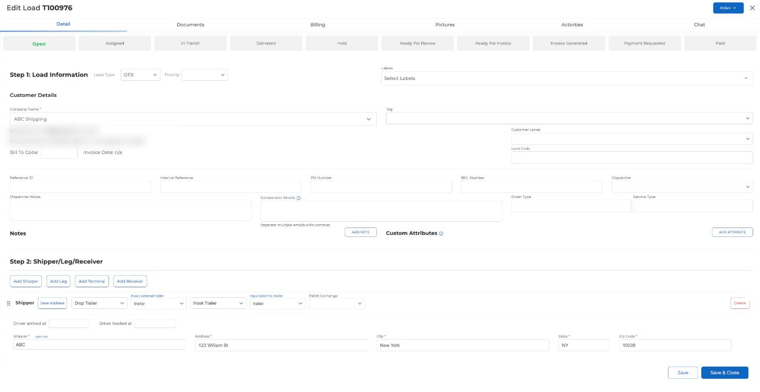
- Loads: in the Tag field at the top of Step 1 of the load.
- Trucks and trailers: in the Tag field on the truck or trailer profile.
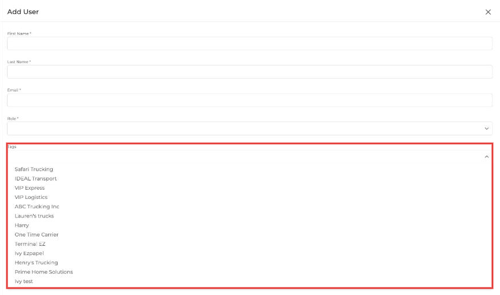
- Users: in the Tags field when you add or edit a user in Settings → Manage User.
Step 4: Filter and report by tag
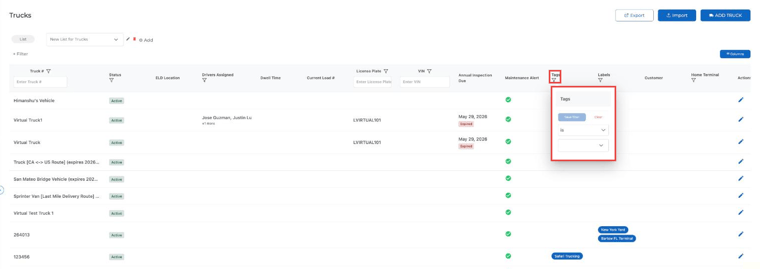
- In the Drivers, Trucks and Trailers lists, click the filter icon on the Tags column and choose a tag.
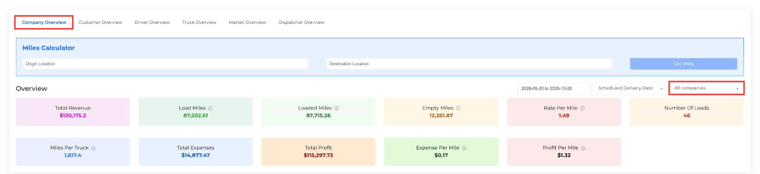
- On the Home dashboard, use the company selector (it says All companies by default) to see numbers for one tag company.
Step 5: Set number prefixes for each tag
Each tag company can have its own numbering, so you can tell at a glance which company a load or settlement belongs to.
- Click the gear icon at the bottom left and go to Company → Number Sequences.
- Pick a tab:
- Load Number: the prefix for each company's load numbers (for example T for your main company, A for Safari Trucking, EXP for VIP Express).
- Driver Pay Settlements: the prefix for each company's settlement numbers.
- Mass Invoice, Load Assignments (trip numbers) and Digital Form Unique Number: the prefixes for those documents.
- Click the edit icon next to the company, enter the prefix and click Submit.
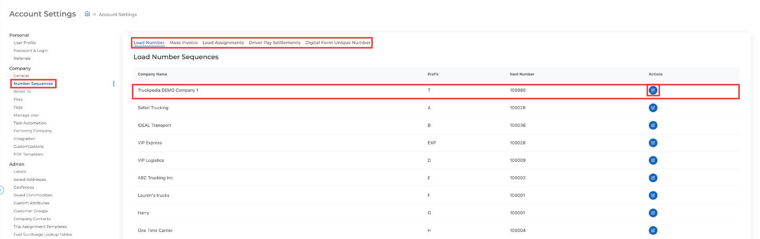
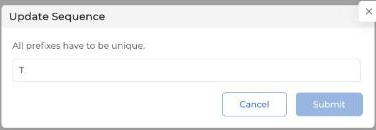
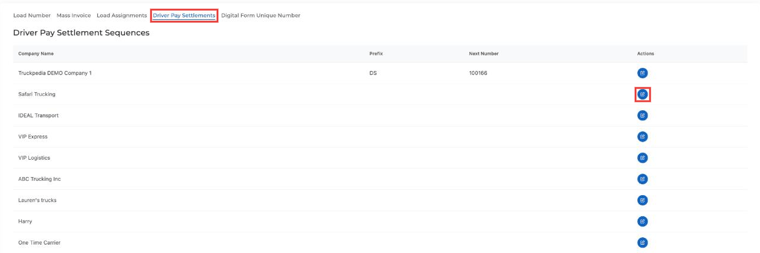
Tip: Every prefix has to be unique. The Next Number column shows the number the next load or settlement will get.
Questions? Email help@truckpedia.io.