
🎥 Watch the video on how to do mass invoicing in Truckpedia
What is a mass invoice?
A mass invoice bills one customer for several loads on a single invoice. To create one:
- All loads must belong to the same customer.
- All loads must be between Delivered and Invoice Generated status. Loads that are Open, Assigned or In Transit can't be mass invoiced.
- All loads must use the same Load Charge version.
- None of the loads can already be on another mass invoice, unless you're adding them to that one.
Mass invoice statuses
Draft: not finalized yet. No PDF is created and the loads don't move to Invoice Generated. You can keep adding or removing loads and changing the issue and due dates. Use this when you want to prepare an invoice now and finalize it later.
Invoice Generated: finalized. A PDF is created and the loads move to Invoice Generated. You can still edit it, and Truckpedia recalculates the totals for you.
Create a mass invoice
Step 1: Select your loads
Go to Dispatch, open a list view and check two or more loads for the same customer. The Batch Actions button shows up at the top right.
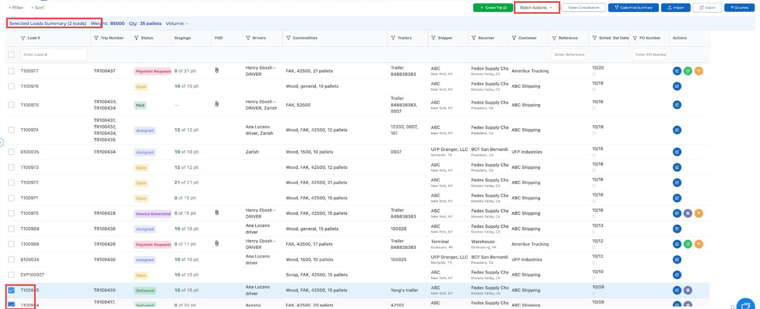
Step 2: Click Batch Actions → Generate Mass Invoice
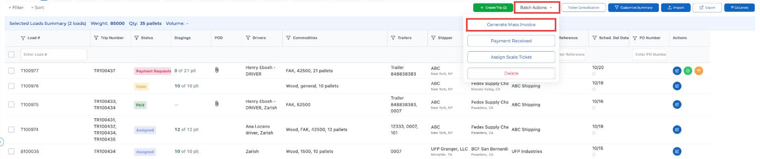
Step 3: Choose how to proceed
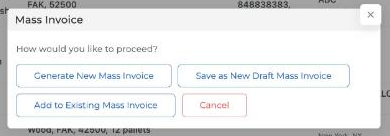
- Generate New Mass Invoice: creates a finalized invoice right away. The PDF is created and the loads move to Invoice Generated.
- Save as New Draft Mass Invoice: creates a draft you can finish later. No PDF yet, and the loads keep their status.
- Add to Existing Mass Invoice: adds the loads to a mass invoice you already made for the same customer (Draft or Invoice Generated). Handy if you forgot a load.
If one of the loads is already on another mass invoice, you'll see an error telling you so.
View and manage mass invoices
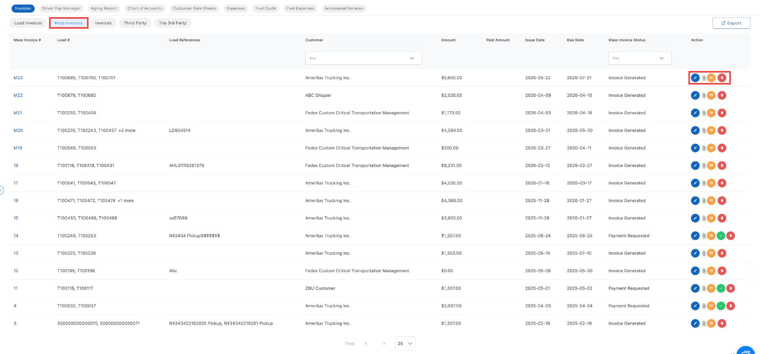
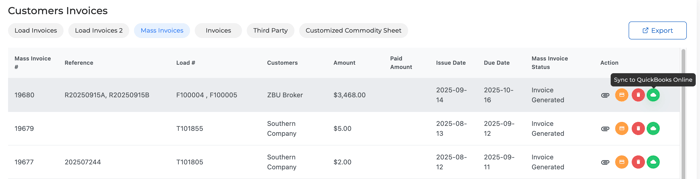
Go to Accounting → Invoices → Mass Invoices. You'll see every mass invoice with its loads, customer, amount, dates and status. Filter by customer or status at the top. In the Action column you can:
- Edit (pencil): open the invoice
- Download PDF (paperclip)
- Request for Payment (orange): send the invoice to the customer
- Mark as Paid (green check): shows once payment is requested
- Delete (red)
Edit a mass invoice
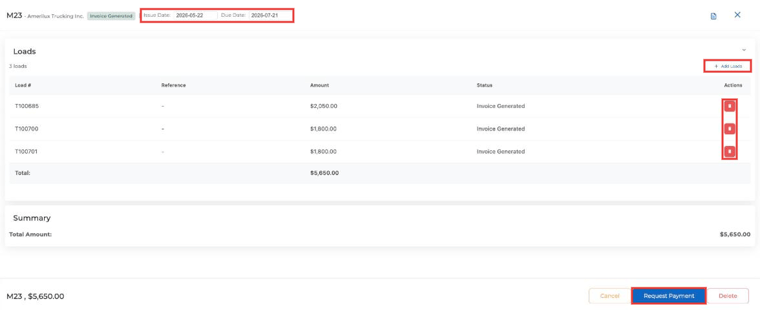
Click the pencil icon. Inside the mass invoice you can:
- Change the Issue Date and Due Date at the top
- Click + Add Loads to pick more loads from a list view
- Remove a load with the red icon next to it
- Click Request Payment to send it to the customer
Note: Mass invoices made before the Draft and Edit update can't be edited.
Find the mass invoice inside a load
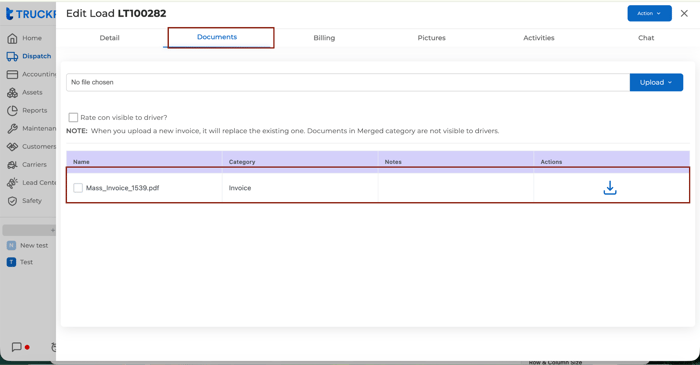
Open any load on the invoice and go to the Documents tab. The mass invoice PDF is there, so you can download it or email it to the customer along with the POD, rate confirmation, lumper receipts and other load documents.
Set your mass invoice numbers
- Click the gear icon at the bottom left and go to Company → Number Sequences.
- Open the Mass Invoice tab.
- Click the edit icon to set the Prefix (for example M or MI) and the next number.

New mass invoices use this sequence automatically.
Sync mass invoices to QuickBooks Online
Step 1: Set the QuickBooks product/service
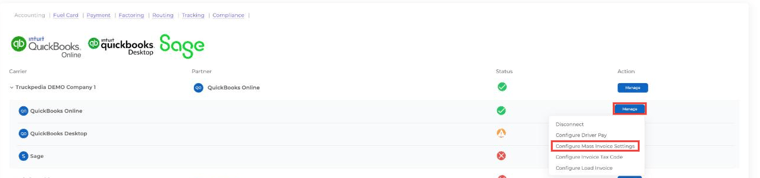
- Go to Settings → Company → Integration, then the Accounting tab.
- Expand your company, click Manage next to QuickBooks Online and choose Configure Mass Invoice Settings.
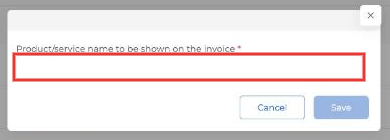
- Enter the product/service name the charges should post to in QuickBooks (for example, Hauling Fee) and click Save.
The invoice number prefix comes from the Mass Invoice number sequence above.
Step 2: Sync the invoice
In Accounting → Invoices → Mass Invoices, click the green cloud icon (Sync to QuickBooks Online) in the Action column. The invoice shows up in QuickBooks with your prefix and product/service name.
Questions? Email help@truckpedia.io.