
Drivers can create their own loads right from the Truckpedia Driver App, for example when they book a load themselves. They can scan or upload the rate confirmation and Truckpedia fills in the details, or they can type them in. The load is assigned to the driver and shows up in the web app for dispatch right away.
🎥 Watch the video on how to self-dispatch a load
Before you start (admins)
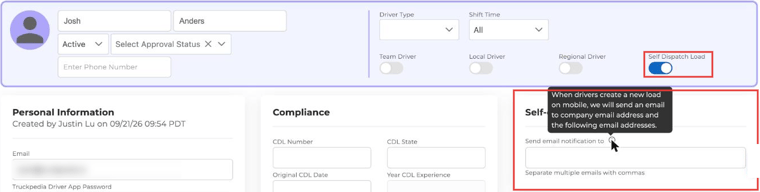
Self-dispatch is turned on per driver in the web app:
- Go to Assets → Drivers and open the driver.
- On the Overview tab, turn on Self Dispatch Load.
- In the Self-dispatch Load card, add any emails that should get notified when this driver creates a load (separate multiple emails with commas). Your company email is always notified.
- Save the driver.
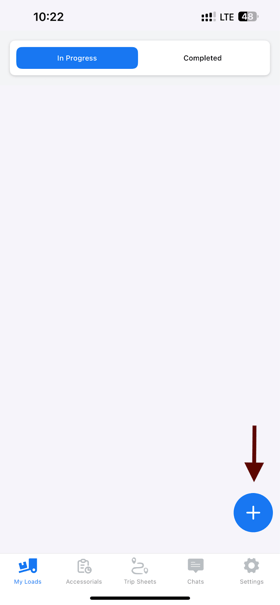
Step 1: Tap the + button
In the Driver App, tap the blue + button at the bottom right of your load list. The Add New Load screen opens.
Step 2: Add the load information
You have two options:
- Use the rate con: tap Choose PDF, then Scan document with camera or Upload PDF from Gallery. Truckpedia reads the rate con and fills in the customer, reference ID, hauling fee, shipper, receiver, addresses, dates and times.
- Type it in: pick the Customer and fill in the Reference ID and Hauling Fee. You can also enter the miles yourself under Specify Miles Manually (optional).
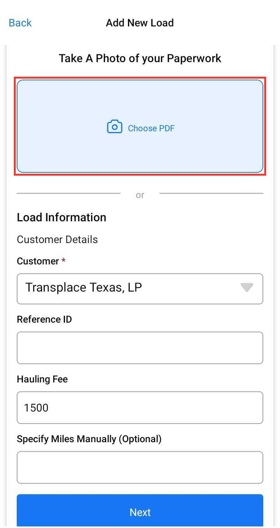
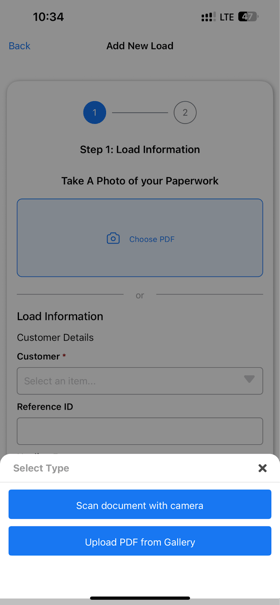
Check the details and tap Next.
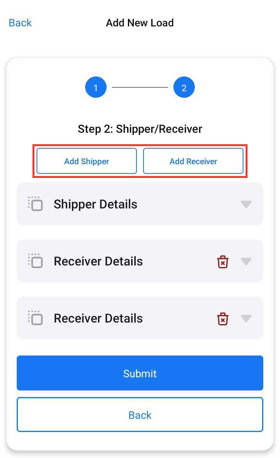
Step 3: Check the shipper and receiver
- Review the Shipper and Receiver details, including address, date and time. Fix anything that's missing or wrong.
- Have more than one pickup or delivery? Tap Add Shipper or Add Receiver to add as many as you need.
Step 4: Submit
Tap Submit. You'll see "New Load Assigned", and the load appears at the top of your In Progress list. Run it like any other load.
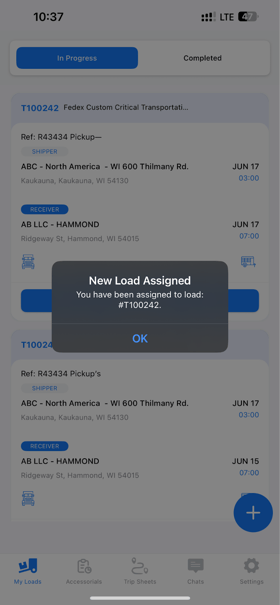
The load also shows up in the web app with the driver assigned, so dispatch can see it, and the people set up in the Self-dispatch Load card get an email.
Need to change something?
Tap Edit next to the load number on the load card to update the details after you've created it.
Need help? Email help@truckpedia.io.