
Driver Pay V1. This guide covers Driver Pay V1, which uses the Driver Pay Planning and Driver Pay Settlements tabs. If your account uses Driver Pay V3 (Settlement Planning and Settlements), see How to Create Driver Pay Settlements – V3.
1. Create a trip sheet template
Go to Accounting → Driver Pay Manager → Trip Sheet Templates and click + New Template.
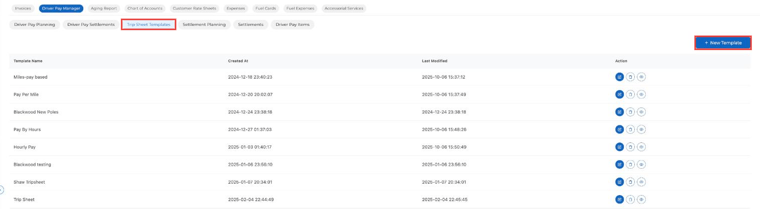
Step 1: Name the template
If you use more than one trip sheet, give each a clear name so drivers pick the right one. For example:
- Per Mile Pay Trip Sheet for mileage-based pay
- Hourly Pay Trip Sheet for drivers paid by the hour
- General Trip Sheet if one sheet works for every trip
Step 2: Choose the fields
Under Trip Sheet Summary and Select Columns, check what drivers need to fill out, such as trip start and end, starting and ending odometer, total miles and hours, detention, truck and trailer number, location, stop name, seals, drop/hook and driver notes (handy for extra comments).
As you check fields, the preview on the right shows how the trip sheet will look.
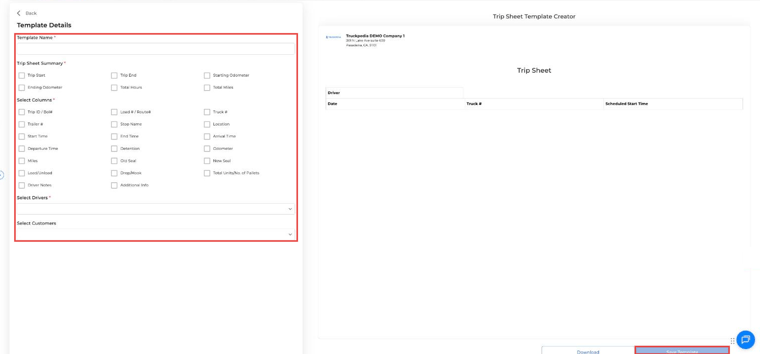
Step 3: Assign it
Under Select Drivers, pick the drivers who use this trip sheet. If a customer needs its own trip sheet, choose them under Select Customers (optional).
Step 4: Save
Click Save Template. You can also click Download to get a copy. The trip sheet is now available to the drivers you chose.
2. How drivers fill out trip sheets
Once a load is dispatched to a driver with a trip sheet, the trip sheet shows up in the Truckpedia driver app. As they run the load, they fill out the required fields:
- Tap Trip Sheets at the bottom of the app, then + New Trip Sheet.
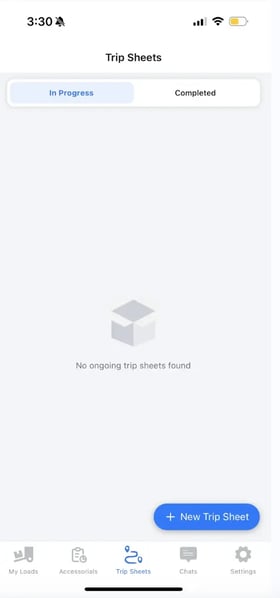
- Pick the right template.
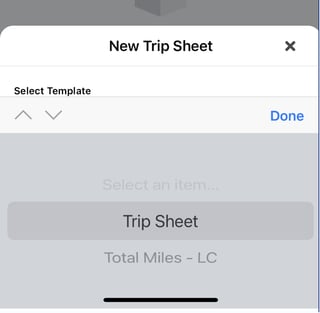
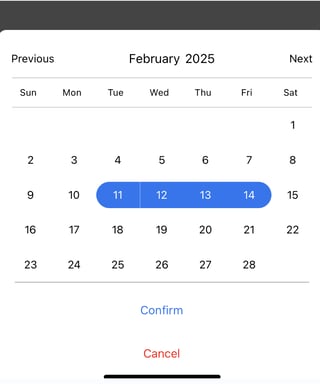
- Choose the date range and tap Confirm.
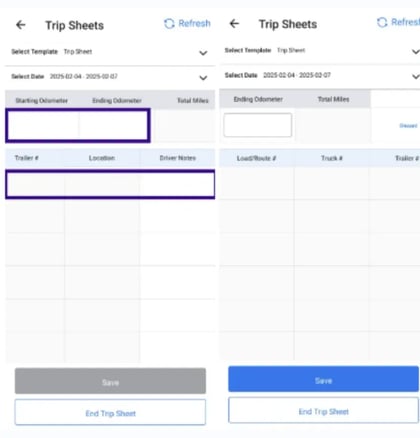
- If a field isn't filled in automatically, double-tap it and enter the value, then tap Save.
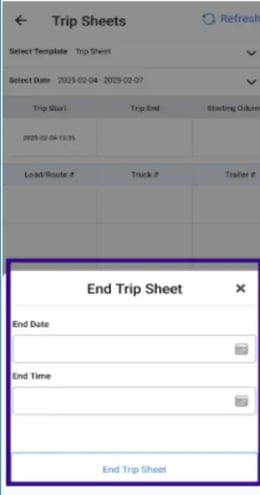
- When the trip is done, tap End Trip Sheet, enter the end date and time, and submit.
3. Paying drivers using trip sheets
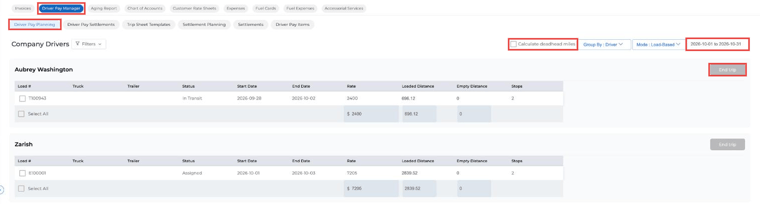
- Go to Accounting → Driver Pay Manager → Driver Pay Planning.
- Click Mode and choose Trip Sheet-Based. You'll see drivers whose pay comes from their trip sheet entries.
- Make sure the right date range is selected at the top right.

- Review the trip sheet entries for each driver.
- Check the entries you want to pay (or Select All) and click End trip.
The trip sheet pay now shows up in Driver Pay Settlements.
4. Checking and approving payments
- Open Driver Pay Settlements and click the blue edit icon on the settlement.
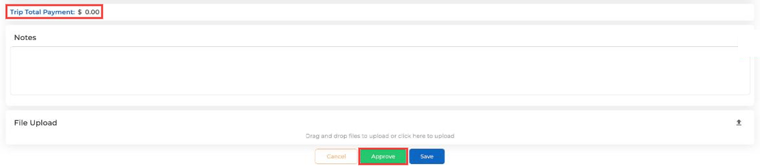
- Edit details, add payments or adjustments, and check the trip total.
- Click Approve to finalize it. If something's wrong, delete the settlement and end the trip again.
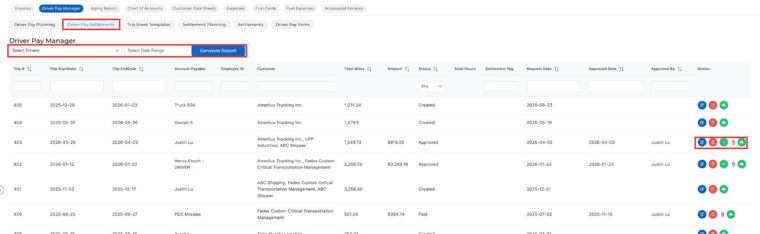
After approval, click the Invoice (paperclip) icon to see the pay statement, and Mark as Paid (green check) once the driver is paid.
Key takeaways
- ✅ Trip sheets give you a structured way to track driver pay.
- ✅ They're assigned per driver and show up in the driver app.
- ✅ Drivers fill out and submit trip sheets in the app.
- ✅ You pay them in Driver Pay Planning using Trip Sheet-Based mode.
Need help? Email help@truckpedia.io.